Last Updated on March 24, 2024
We can create graph by using received serial data from arduino Serial Monitor. Transfer arduino or genuine serial data to computer by using processing program and get graph result.

For to do this you need to program Arduino to read any one sensor and direct the data to serial port terminal. In our case we use Force Sensitive Resistor 0.5″ as analog input sensor and directed output to the Serial Monitor.
Arduino Code to Read Analog Sensor
void setup() {
// initialize serial communication at 9600 bits per second:
Serial.begin(9600);
}

// the loop routine runs over and over again forever:
void loop() {
// read the input on analog pin 0:
int sensorValue = analogRead(A0);
// print out the value you read:
Serial.println(sensorValue);
delay(1); // delay in between reads for stability
}
Processing Code (paste in processing IDE)
import processing.serial.*;

Serial myPort;        // The serial port
int xPos = 1;         // horizontal position of the graph
float inByte = 0;

void setup () {
  // set the window size:
  size(400, 300);

  // List all the available serial ports
  // if using Processing 2.1 or later, use Serial.printArray()
  println(Serial.list());

  // I know that the first port in the serial list on my mac
  // is always my  Arduino, so I open Serial.list()[0].
  // Open whatever port is the one you're using.
  myPort = new Serial(this, Serial.list()[0], 9600);

  // don't generate a serialEvent() unless you get a newline character:
  myPort.bufferUntil('\n');

  // set inital background:
  background(0);
}
void draw () {
  // draw the line:
  stroke(127, 34, 255);
  line(xPos, height, xPos, height - inByte);

  // at the edge of the screen, go back to the beginning:
  if (xPos >= width) {
    xPos = 0;
    background(0);
  } else {
    // increment the horizontal position:
    xPos++;
  }
}


void serialEvent (Serial myPort) {
  // get the ASCII string:
  String inString = myPort.readStringUntil('\n');

  if (inString != null) {
    // trim off any whitespace:
    inString = trim(inString);
    // convert to an int and map to the screen height:
    inByte = float(inString);
    println(inByte);
    inByte = map(inByte, 0, 1023, 0, height);
  }
}
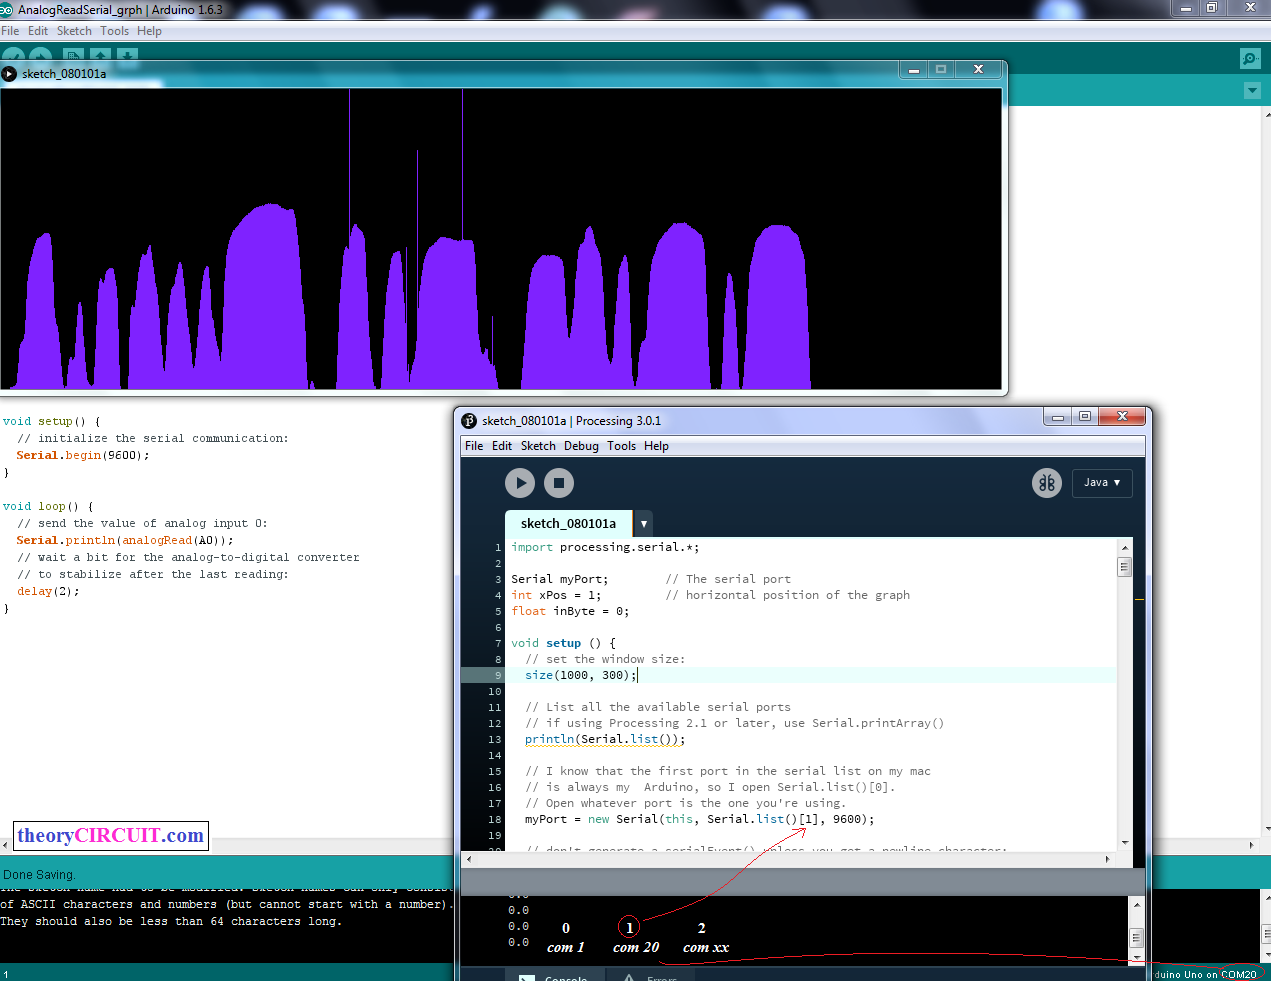
Put the program code in processing application, be careful to select console number as shown in image, if you have more than one port available follow the order as
0 = first port (com 1)
1 = second port (com 6)
2 = third port (com 8)
3 = fourth port (com 14)
Here the port number com 1,6,… are given for examples you may have different numbers.
Look at the Serial Monitor of arduino and select the console number same as to arduino serial monitor port number and replace the index in Serial.list()[0].
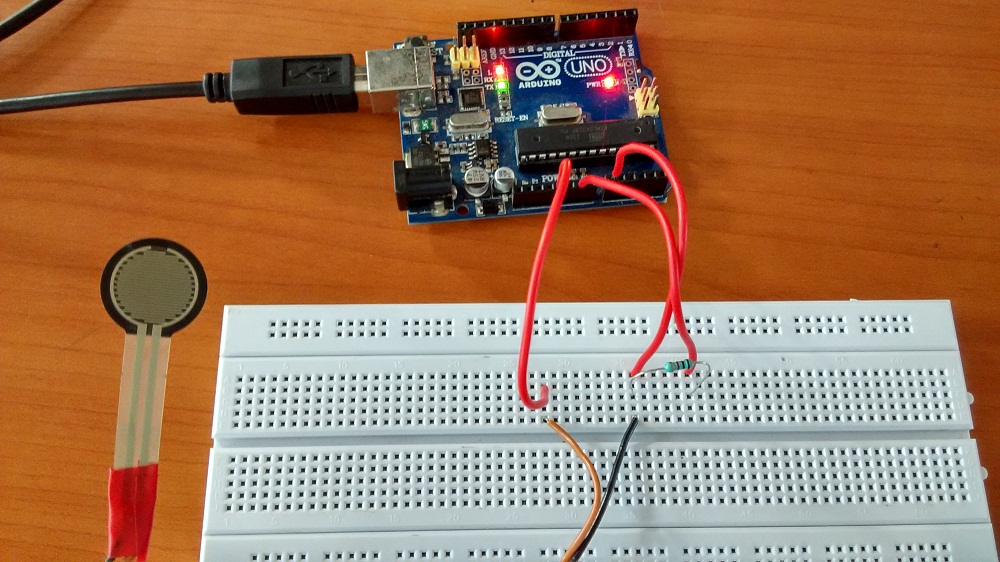
Prototype
Note: do not run serial monitor and processing at the same time, any one at a time.
Steps to Follow
Step 1: Connect any sensor with arduino board.
Step 2: Upload sensor reading sketch on arduino board (here the arduino code given for to read analog sensor connected in A0 pin), the arduino code should direct output to serial monitor “serial.println”
Step 3: Paste the given processing code in Processing IDE, if you don’t have processing IDE google it to get one.
Step 4: Remember to select correct console number as mentioned in this tutorial.
Step 5: Now Use only processing run option you will get graph output for sensor reading connected with arduino.